KR
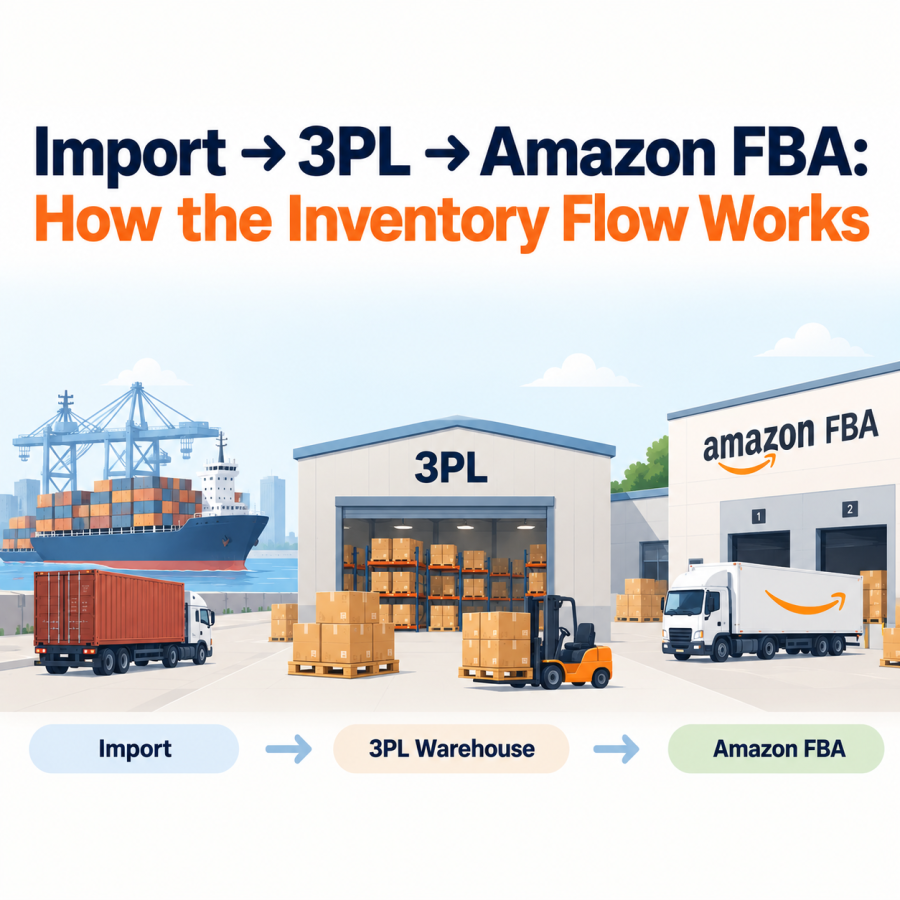
For international sellers, getting products onto Amazon’s shelves is not one shipment. It is a chain of handoffs: goods leave a factory abroad, clear U.S. customs, land at a warehouse, get prepared for Amazon, and then move into Amazon’s fulfillment network, often in several smaller batches over time.
Amazon FBA prep for imported products is the part that sits in the middle of that chain, and it matters more now that Amazon announced it would stop providing prep and item-labeling services for U.S. FBA shipments beginning January 1, 2026. This guide walks through the seven steps of the flow, who is typically responsible for each, and what to check before you start.
Step 1: Import Products Into the U.S.
Everything starts with a lawful, well-documented import. For ocean freight, that generally involves:
- An Importer of Record (IOR). This is the party legally responsible for the import, including the accuracy of the customs declaration and payment of any duties and fees. International sellers sometimes act as their own IOR, and sometimes use a U.S.-based party. Foreign IOR rules are currently being tightened under Executive Order 14411, so it is worth confirming your setup with a licensed customs broker before your next shipment. See the Federal Register text of the order for the underlying directives.
- An Importer Security Filing (ISF). For most ocean imports, the ISF must be submitted to U.S. Customs and Border Protection (CBP) no later than 24 hours before the cargo is loaded onto the vessel at the foreign port. CBP explains the program on its Importer Security Filing page.
- A customs entry and bond. For many commercial shipments valued at $2,500 or more, a formal customs entry is generally required, though exceptions and additional requirements may apply depending on the merchandise. The ISF is a separate advance security filing and does not replace the entry. A customs bond is generally part of the process for the applicable entry type, and your broker can confirm which one fits your shipments.
- Correct classification, origin, and duty treatment. The final duty on a product depends on its HTS classification, country of origin, and any applicable additional duties or trade remedies, not on the HTS code alone.
Amazon is not involved at this stage. Until the goods are cleared and released, they are simply imported cargo, and the responsibility for compliance sits with the importer and its customs broker.
Step 2: Deliver Inventory to a 3PL
Once the container is released and available, a drayage or trucking carrier moves it from the port or rail ramp to your U.S. 3PL warehouse. Many international sellers choose this route, rather than sending cargo from the port straight into Amazon, because it gives them a place to receive, count, store, and prepare goods before Amazon sees them.
Before the container arrives, it helps to send the 3PL the documents and data it needs to plan: the packing list, the purchase order or ASN, SKU and carton counts, and any special handling notes. If the container is going to a warehouse near a major gateway such as Houston, you can also line up appointment times and chassis arrangements with your forwarder so the container does not sit at the terminal longer than necessary.
Step 3: Receiving and Inspection
At the warehouse, the container is unloaded (devanned), and inventory is received into the 3PL’s warehouse management system (WMS). Receiving typically includes checking shipment quantities and visible condition against the provided documents, recording any discrepancies, and updating the WMS.
More detailed inspections, such as opening cartons to check individual units, counting inner packs, or testing function, are generally separate services performed according to the agreed scope of work. If you want that level of checking, say so up front and put it in writing, because it affects both cost and turnaround time.
Step 4: FBA Prep and Labeling
This is the step where products become “Amazon-ready.” Amazon’s own guidance on FBA packaging, prep, and labeling covers the details, and the main elements include:
- Barcodes. Amazon tracks inventory by barcode. Many products can use their manufacturer barcode (UPC, EAN, JAN, or ISBN), while others require an Amazon barcode label, including certain product categories and, in many cases, resellers who do not hold the necessary Brand Registry role. Amazon has also ended commingling for inventory shipped on or after March 31, 2026, which affects which barcode a given seller can use. Which rule applies depends on your account and listing, so confirm it in Seller Central.
- Label quality. Self-printed Amazon barcode labels need to be sized and printed to Amazon’s specifications, placed on a flat surface, and be scannable. Damaged or poorly printed labels can be rejected.
- Packaging by product type. Certain products, including liquids, powders, apparel, plush items, and baby products, may require additional preparation such as poly-bagging, sealing, or protective packaging, depending on their characteristics and existing packaging. Sharp, fragile, or glass items may require additional protection, while sets sold as a single unit must be packaged and identified accordingly.
- Covering conflicting barcodes. When Amazon barcode labels are required, other scannable product barcodes that could interfere with inventory identification should be covered or made unscannable, in accordance with Amazon’s current labeling requirements.
Who does this work matters. Amazon announced that, beginning January 1, 2026, it stopped providing prep and item-labeling services for U.S. FBA shipments, so this work needs to be done before inventory reaches Amazon, either by you, by a prep provider, or by a 3PL that offers it. According to responses from Amazon staff in Seller Central discussions, products that arrive without proper prep or labeling may not be eligible for reimbursement if damaged or lost, and prep issues are surfaced as defects in the Inbound Performance Dashboard. A 3PL that supports FBA prep can perform the labeling and packaging steps your products need, but the exact tasks should be defined in your service agreement.
Step 5: Pallet or Carton Preparation
Once units are prepared, they are packed into cartons and, for larger shipments, built onto pallets. Amazon sets specific requirements for this stage, and they differ depending on whether you ship by small parcel, less-than-truckload (LTL), or full truckload (FTL). In general, this step covers:
- Packing units into shipping cartons by SKU and quantity according to the shipment plan
- Providing carton content information so Amazon can receive the contents accurately
- Applying Amazon-generated shipment labels to each carton, and pallet labels to each pallet for freight shipments, once the shipment plan has been created in Send to Amazon (see Step 6) — in practice, packing and plan details are often completed in parallel
- Building pallets that meet Amazon’s current requirements for pallet type, height, weight, and wrapping
Because the specifics, such as size and weight limits, can be updated and vary by shipment type, check Amazon’s current inbound requirements in Seller Central when you build the shipment rather than relying on a general rule of thumb. Errors at this stage can cause receiving delays or refused deliveries, which is why many sellers have their 3PL handle cartons and pallets under a clear, written preparation standard.
Step 6: Ship to Amazon
Before finalizing carton and pallet labeling, sellers use Send to Amazon to create and complete their shipment plan, including product quantities, packing details, and inbound placement options. Amazon-generated shipment labels are then applied to the corresponding cartons and pallets before the freight is handed over to the carrier. Amazon assigns destination fulfillment centers, and the placement option you pick can affect how many locations your inventory goes to and whether an inbound placement service fee applies. Fees and options change, so compare Amazon’s estimate for each shipment before you confirm.
From there, the shipment is booked as small parcel or freight, depending on size. Sellers can use Amazon’s Partnered Carrier program or arrange their own carrier, subject to Amazon’s requirements and appointment rules. Your 3PL typically hands the shipment to the carrier, and tracking updates follow as the freight moves to the assigned fulfillment centers.
Step 7: Replenish Inventory as Needed
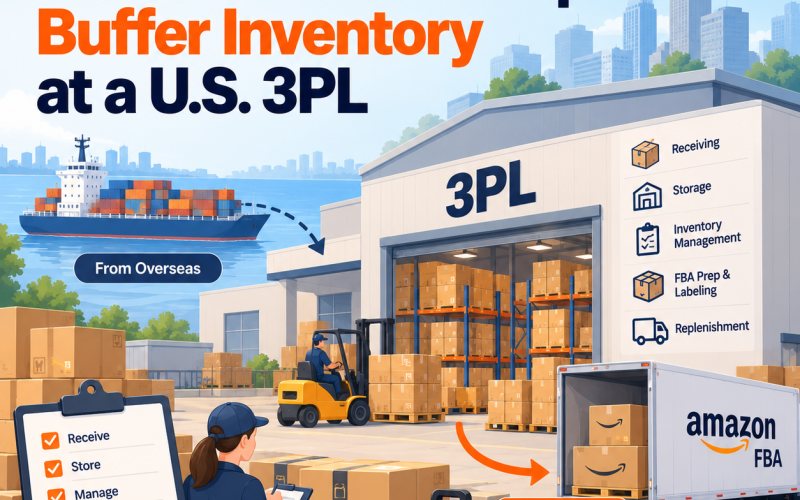
Replenishment is where the 3PL model pays off over time. Instead of sending an entire container to Amazon at once, many sellers keep a reserve at the 3PL and send smaller, regular batches as FBA stock runs down. This helps in a few ways:
- Capacity limits. Amazon generally applies monthly FBA capacity limits, measured in cubic feet, although certain seller accounts, including newer professional selling accounts, may be exempt. Where a limit applies, it caps how much inventory you can send and store at Amazon, so sending only what you need can keep you within bounds.
- Cash flow and flexibility. Inventory you hold at your own warehouse can be redirected to another channel or reworked if a listing changes.
- Stock availability. Keeping replenishment batches smaller and more frequent can help avoid stockouts, provided your shipment planning and Amazon’s receiving times are taken into account.
Amazon also offers its own bulk-storage option, Amazon Warehousing and Distribution (AWD), which can replenish FBA automatically. Whether AWD, a U.S. 3PL, or a combination fits best depends on your products, sales channels, and cost structure.
What to Prepare Before You Start
- Confirm your IOR and customs setup with a licensed customs broker before the first shipment.
- File your ISF accurately and on time, before the cargo is loaded at the origin port.
- Decide who will do prep and labeling, and write the scope into your agreement with the 3PL.
- Check your barcode setup in Seller Central so labels match your account’s requirements.
- Review Amazon’s current inbound, carton, and pallet requirements when you build each shipment.
- Plan replenishment cycles around your capacity limit and sales velocity.
Key Takeaway
Amazon FBA prep for imported products works best when it is treated as a deliberate stage between customs clearance and Amazon, not an afterthought. Import compliance, warehouse receiving, prep and labeling, pallet or carton preparation, and the Amazon shipment itself each have their own requirements and risks. Setting clear responsibilities at each handoff, especially for prep scope, makes the whole flow easier to manage and troubleshoot.
PNP LINE supports international sellers across this flow with international freight forwarding, customs clearance coordination through licensed customs broker partners, U.S. warehousing, FBA prep and labeling coordination, pallet and carton preparation, and replenishment shipments. Learn more about our international freight forwarding, U.S. customs clearance, and Texas warehouse services.
📋 Request an Online Quote https://www.pnpline.com
Source References
- Federal Register, “Strengthening Customs Enforcement” (Executive Order 14411), published June 10, 2026 — https://www.federalregister.gov/documents/2026/06/10/2026-11595/strengthening-customs-enforcement
- U.S. Customs and Border Protection, “Importer Security Filing (ISF) ‘Ten Plus Two’ Program” — https://www.cbp.gov/trade/trade-community/programs-outreach/importer-security-filing-ten-plus-two
- Amazon, “FBA prep, packaging, and labeling: A beginners guide” (Sell on Amazon, July 7, 2026) — https://sell.amazon.com/blog/fba-packaging-prep-labeling
- Amazon, “Amazon announces new streamlined FBA capacity management system” (Sell on Amazon) — https://sell.amazon.com/blog/announcements/fba-capacity
- Amazon, “How Amazon Warehousing and Distribution (AWD) can make your supply chain and Amazon FBA work better” (Sell on Amazon, June 5, 2025) — https://sell.amazon.com/blog/send-products-to-amazon-warehousing-and-distribution
- Amazon Seller Central Forums, “Commingling practices will end effective March 31, 2026” — https://sellercentral.amazon.com/seller-forums/discussions/t/106d0747-e5c6-44d8-86f3-7669f11238fe
- Amazon Seller Central Forums, “New FBA Prep Rule (Jan 1, 2026) – Seller Risk & Unplanned Prep Fees” (responses from Amazon staff) — https://sellercentral.amazon.com/seller-forums/discussions/t/32e1d348-10b4-46ae-ae29-74a0cb3b182a
- Packaging Insights, “Amazon ends US prep and labeling services in 2026 to boost efficiency” (industry reporting on the January 1, 2026 prep change) — https://www.packaginginsights.com/news/amazon-fba-packaging-labeling-changes-2026.html
Disclaimer: Customs requirements and Amazon’s FBA policies, including prep, labeling, inbound placement, capacity limits, and fees, change frequently and can vary by seller account, product category, and shipment. This article is provided for general informational purposes and does not constitute legal, customs, tax, or Amazon-policy advice. Sellers should confirm current requirements with a licensed customs broker, in Seller Central, and with their logistics provider before making import, prep, or shipping decisions.
#Amazon FBA prep for imported products, #Amazon FBA prep international sellers, #import inventory to Amazon FBA, #3PL to Amazon FBA, #FBA prep warehouse USA, #Amazon FBA replenishment